such as glass stair railings, pool fences, and balcony railings, they are the key hardware ensuring stable glass installation. Choosing the right glass spigot isn’t just a matter of "square vs. round"—the real decision-making core lies in the installation scenario (terrace vs. staircase) and base material (concrete vs. wood). This blog will classify and analyze glass spigots from three core dimensions: installation location, fixing method, and functional characteristics. It will also compare the key points of different installation processes to help you make professional engineering selection decisions.
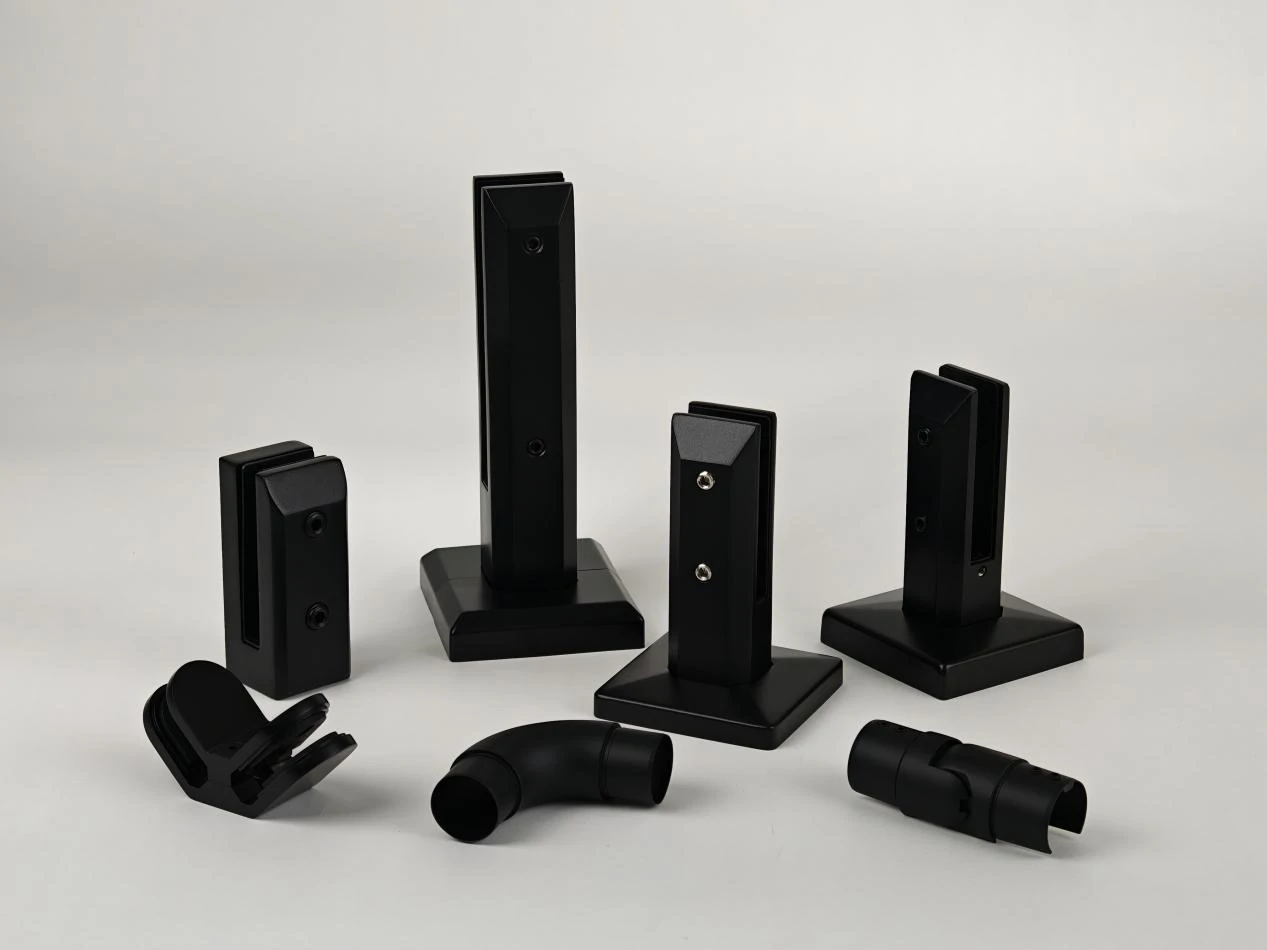
Classification by Installation Location – Where to Install Glass Spigots?
Installation location directly determines space utilization and visual effect, and it is mainly divided into two types: floor-mounted and side-mounted.
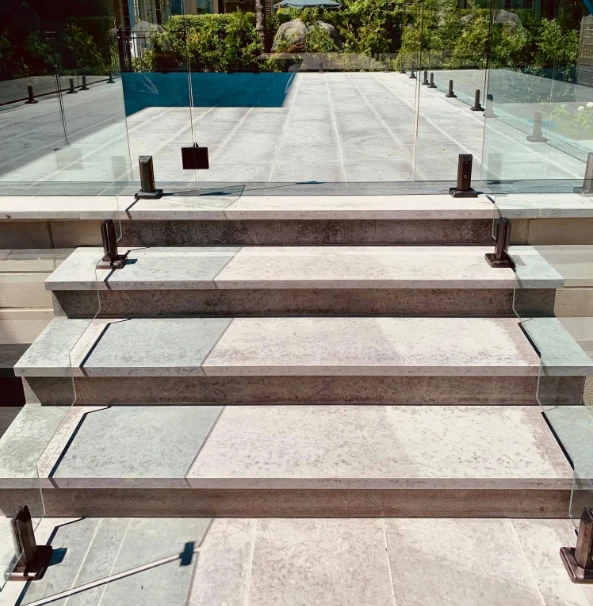
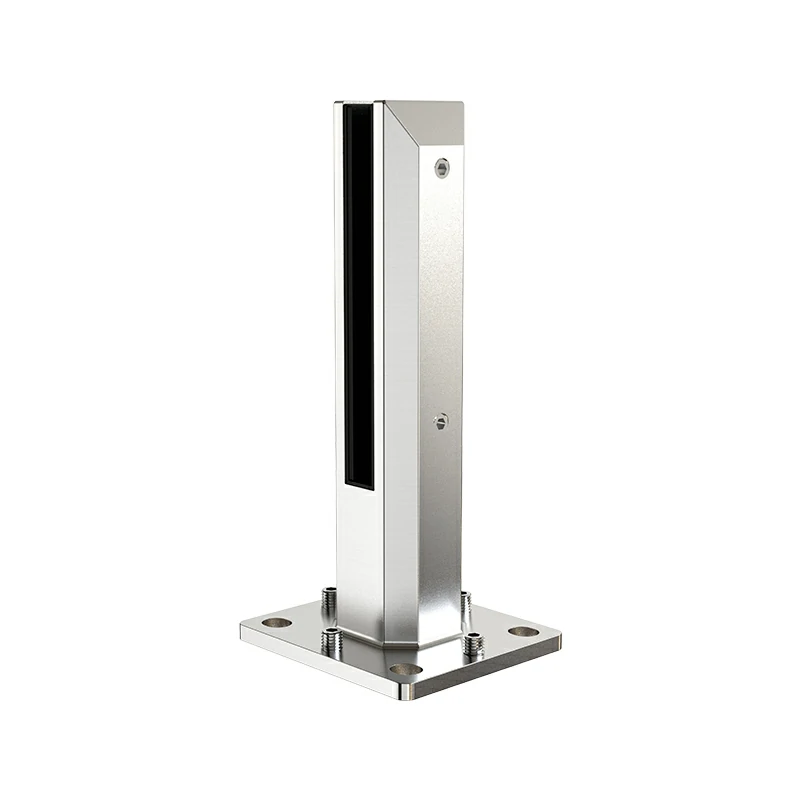
1.Floor-Mounted Glass Spigots (Top-Mounted Type)
This is the most common type, directly installed on the floor surface (terraces, courtyards, balconies, pool surroundings, etc.), fixing the glass panel through vertical support.
-
Applicable Scenarios: Flat scenarios such as , large terraces, roof decks, and open courtyards; the most versatile choice.
-
Visual Effect: Presents a classic "fence-style" appearance. Glass spigots stand upright from the floor, with glass panels firmly in place, creating a clean, elegant overall style that doesn’t block the view.
-
Core Advantages: Easy to install, uniform force bearing, and relatively loose requirements on the flatness of the base. Suitable for most frameless glass fixing needs, such as safety fences around pools and glass railings on balconies.
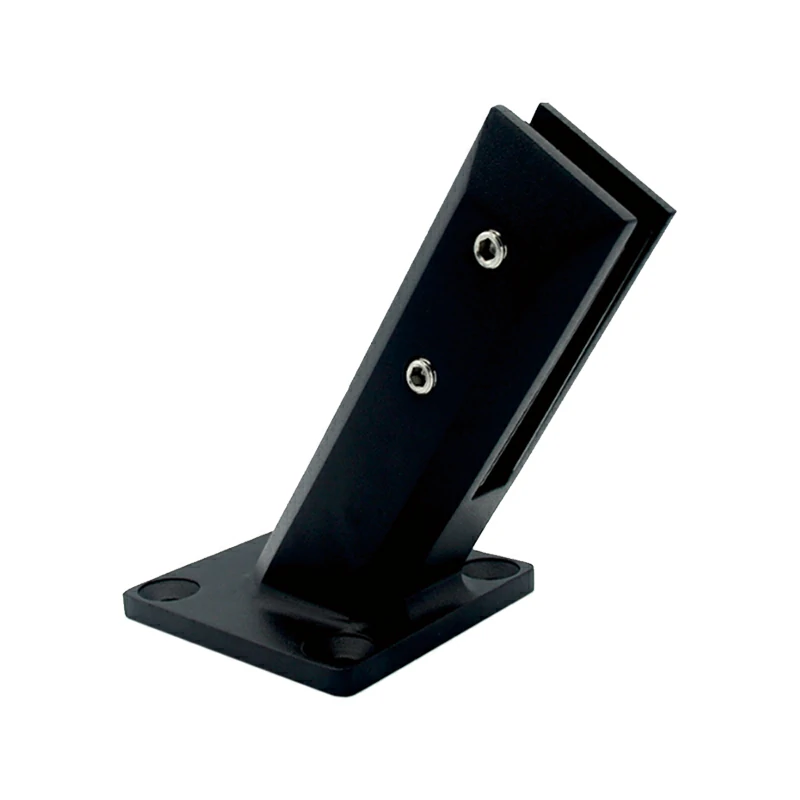
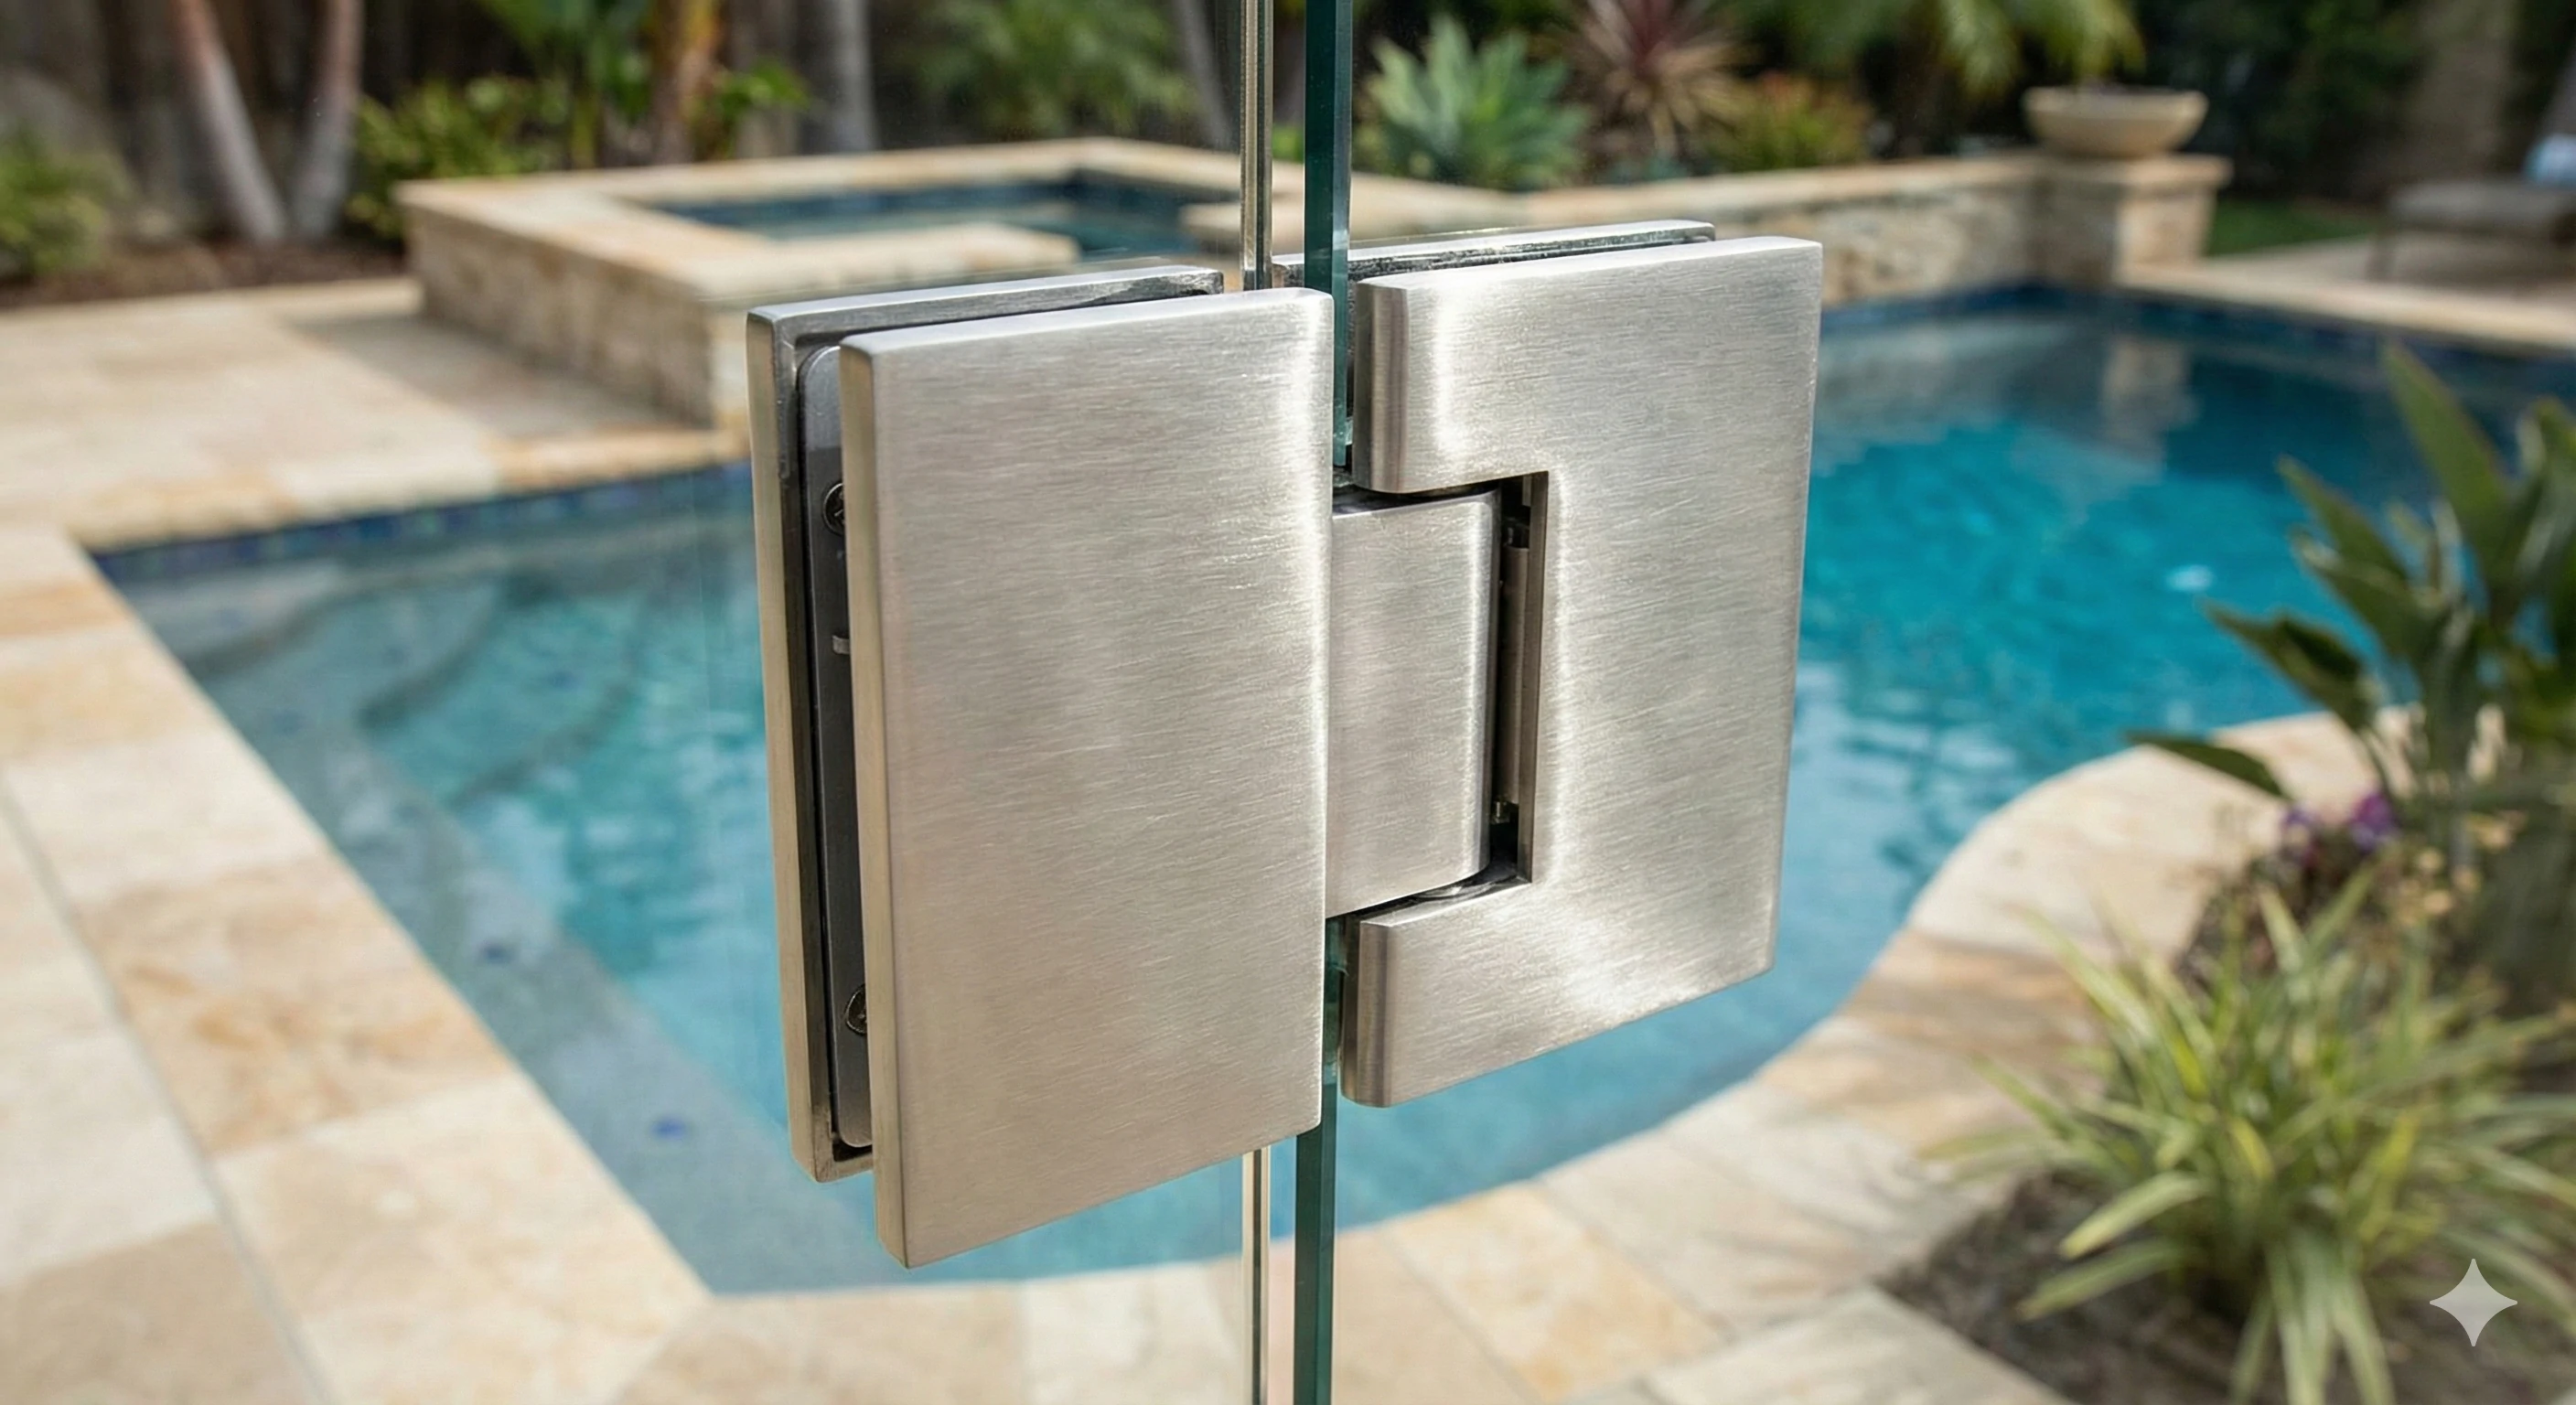
2.Side-Mounted Glass Spigots (Facade-Mounted Type)
Fixed to the vertical facade of the floor edge or staircase beam with bolts, rather than the top surface, it is a "suspended" fixing method specifically designed for space-constrained scenarios.
-
Applicable Scenarios: Narrow stair railings (saving passage width), small balconies (maximizing usable space), glass railings on cantilever slab edges, etc.
-
Visual Effect: Creates a transparent "floating glass" texture. The glass panel seems to cantilever from the edge, and the structural presence of the glass spigot is extremely low, making the space more open and transparent—especially suitable for side fixing of glass stair railings.
-
Core Advantages: Maximizes space savings without occupying floor area. At the same time, it maintains the transparent aesthetics of frameless glass, perfectly suitable for small apartments or frameless glass railing systems pursuing a minimalist style.
Classification by Fixing Method – How to Install Glass Spigots?
The fixing method depends on the base material and structural strength requirements, mainly divided into screw fixing and drilling pre-embedding, which directly affects the stability of glass installation.
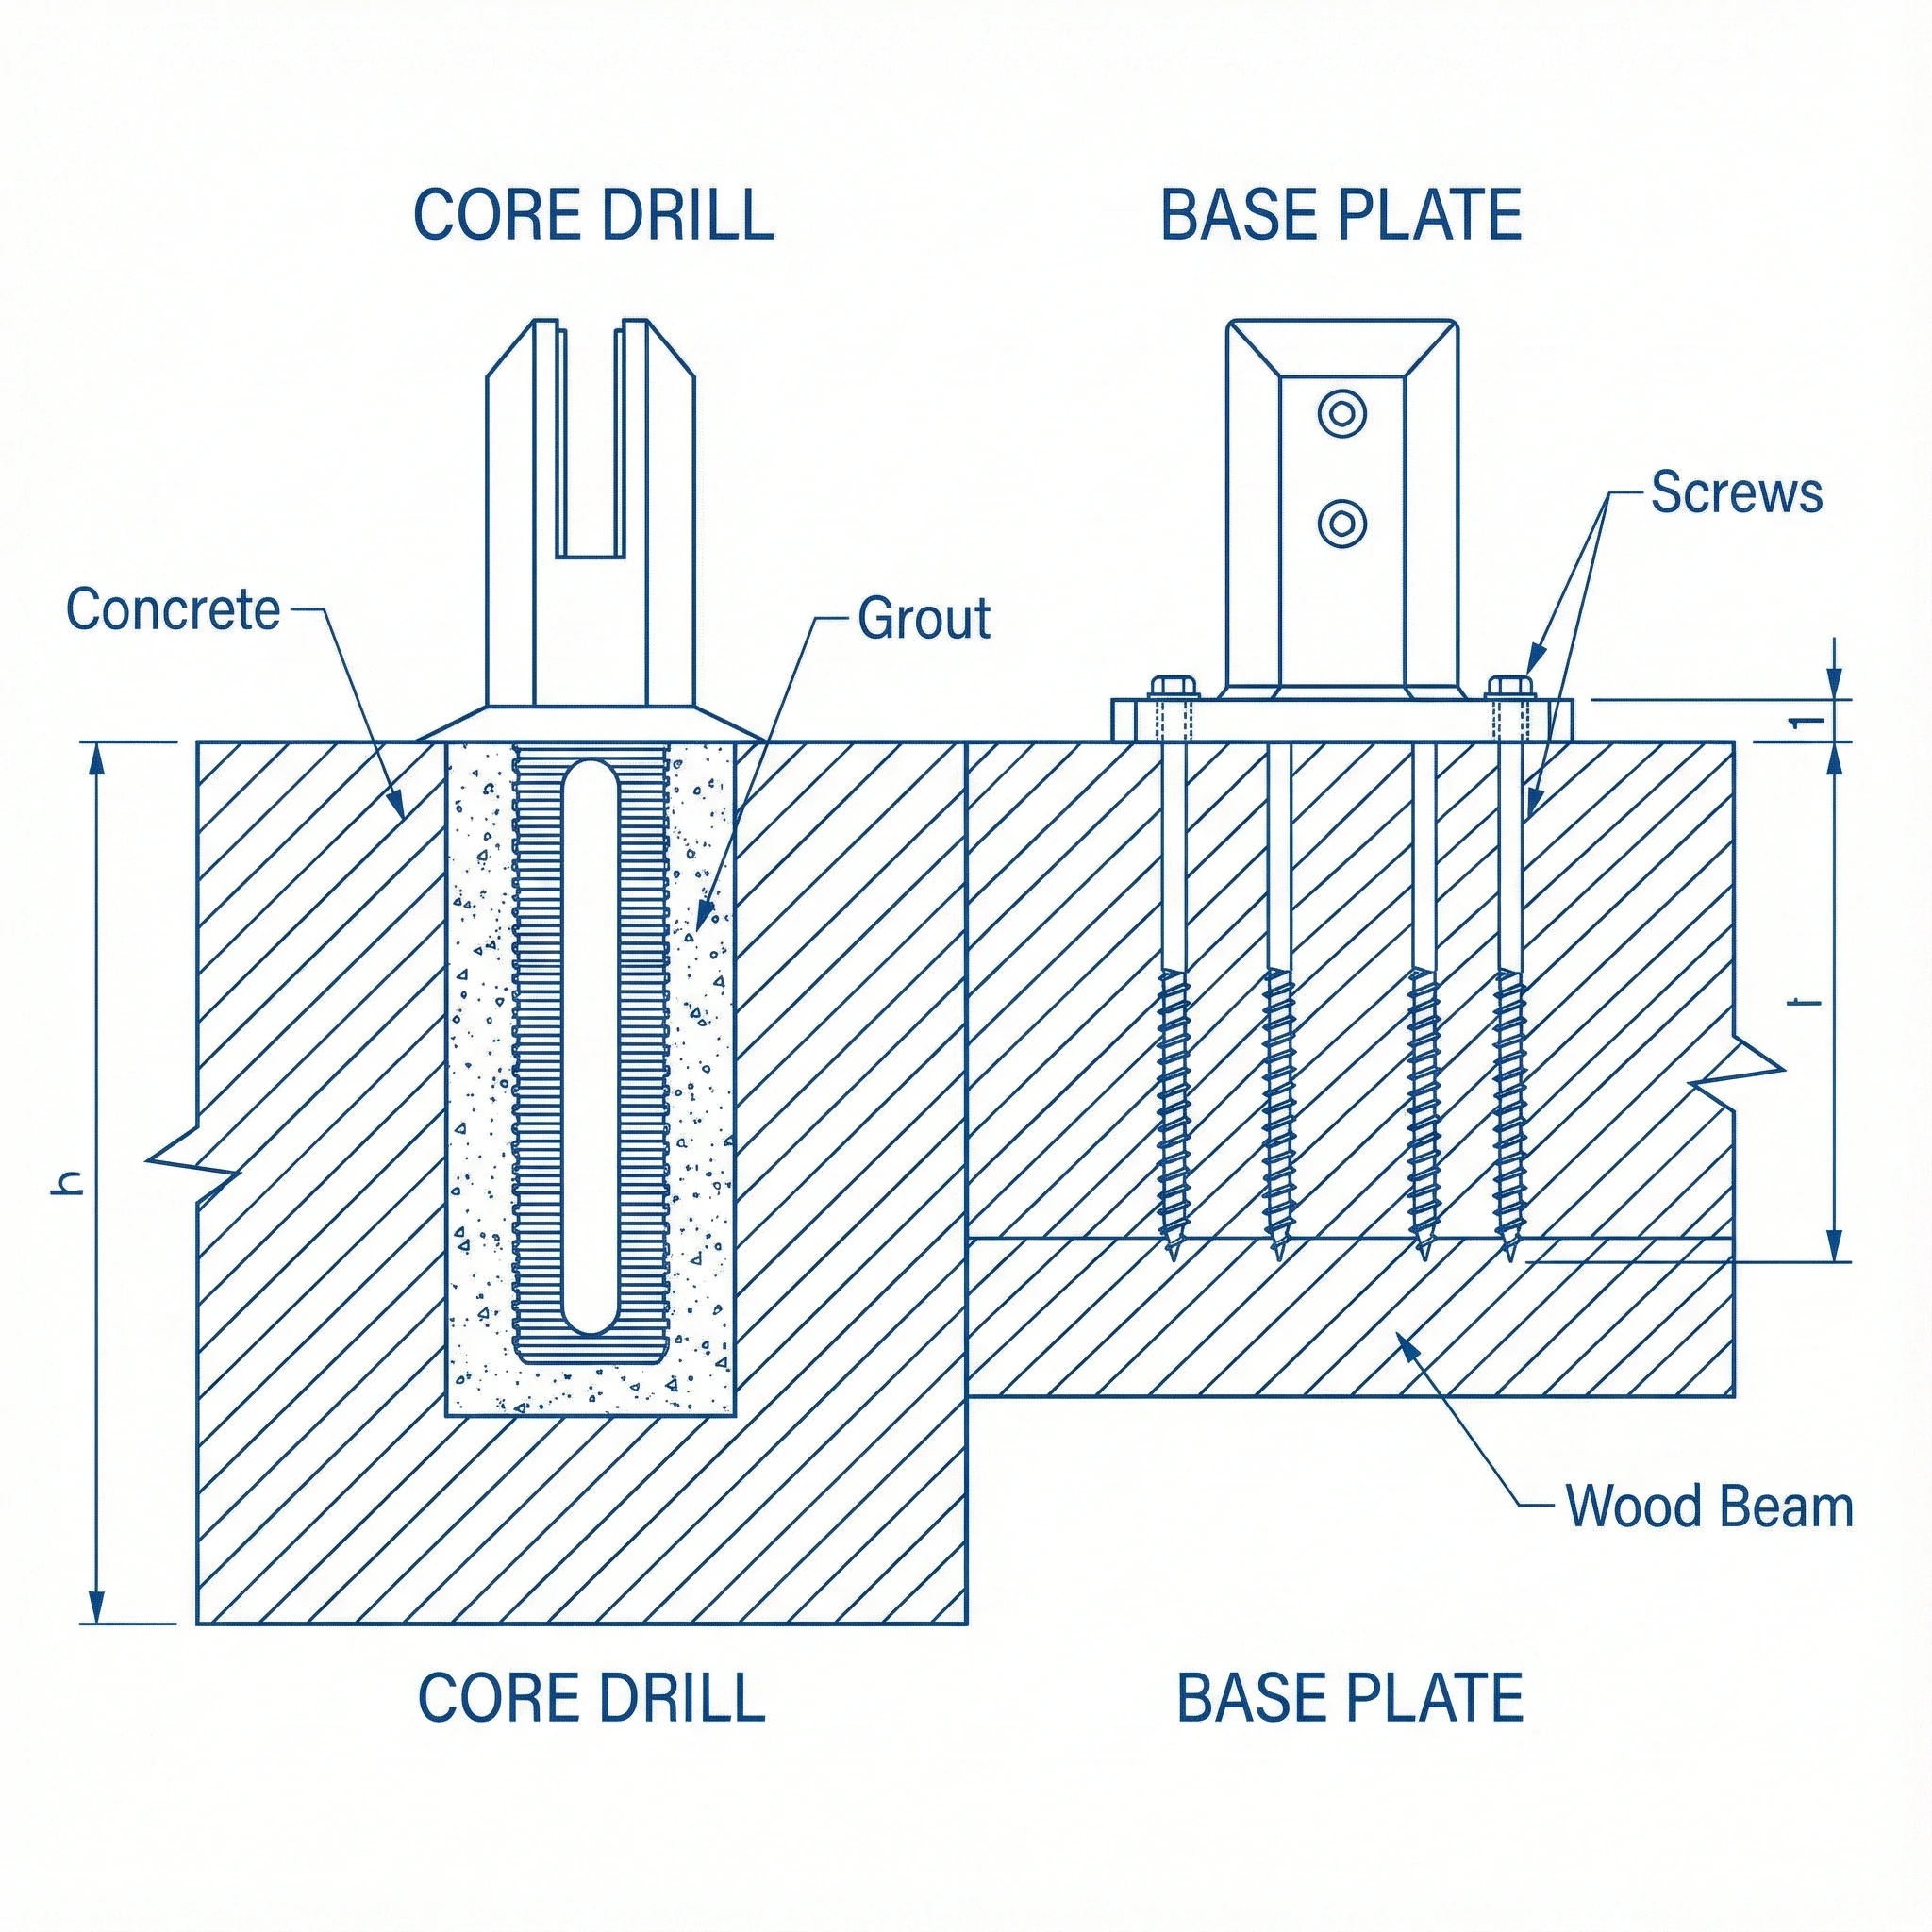
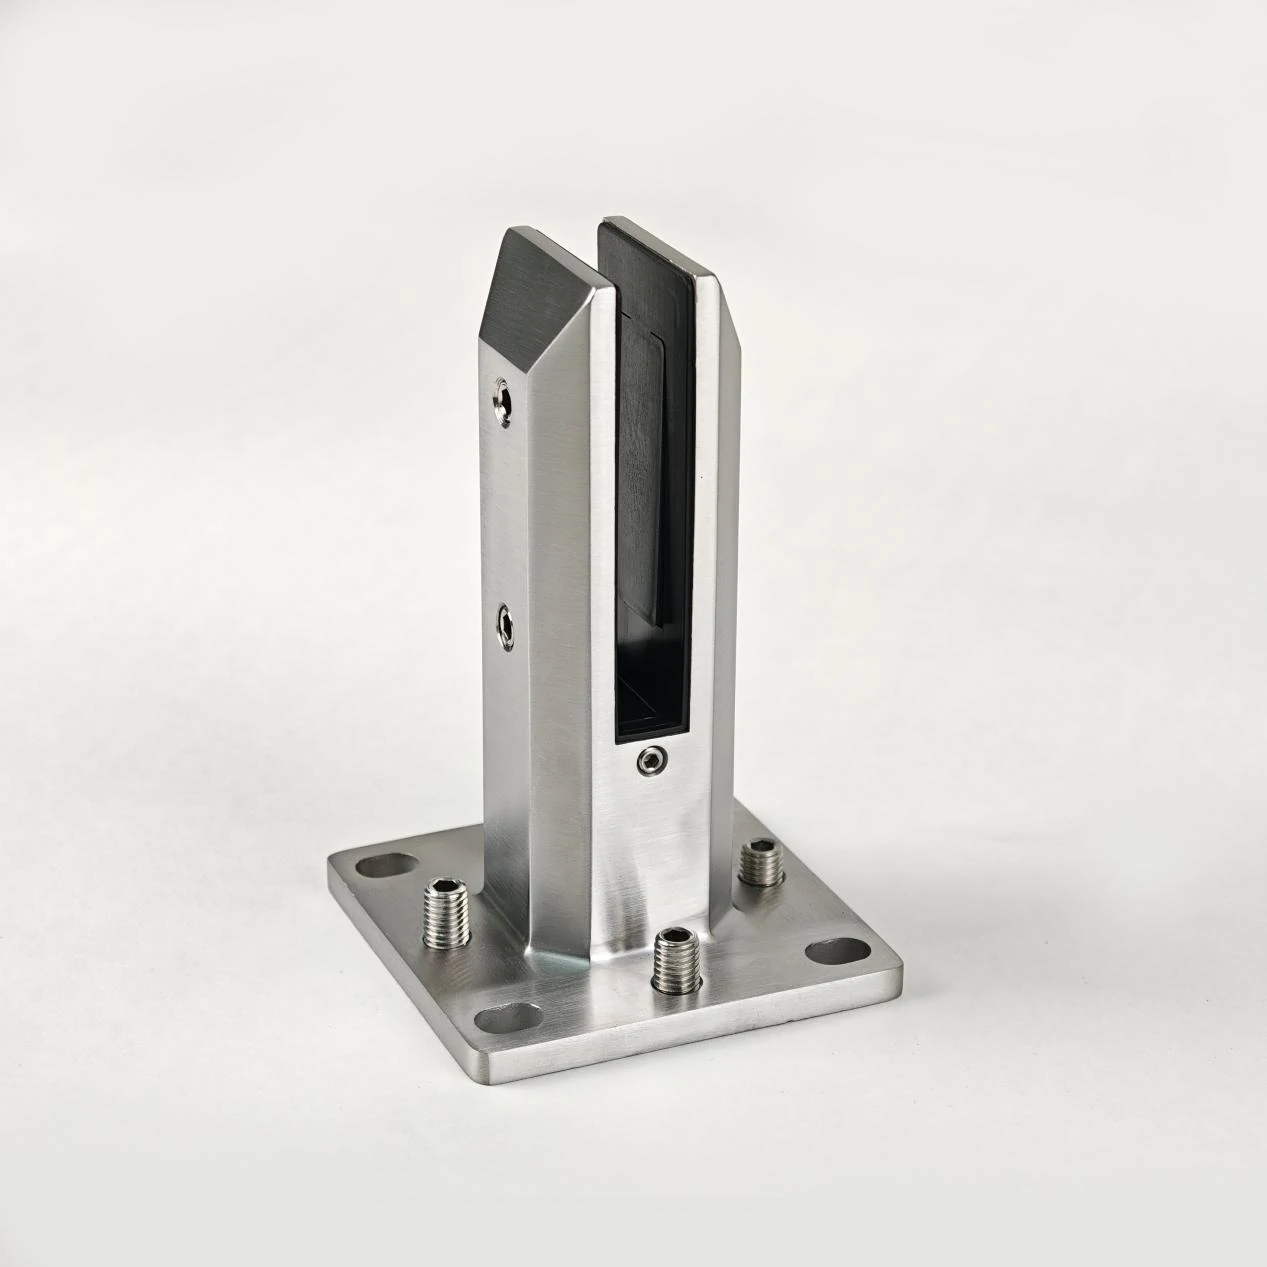
1.Screw-Fixed Glass Spigots (Base Plate Type)
Structural Features: Equipped with a welded base plate at the bottom, with 4 . Fixed to the base by passing screws through the base plate, it is the easiest fixing method to operate.
Suitable Bases:
-
Wood/composite flooring: are required to fix to the keel to ensure that the glass spigot does not loosen after bearing the weight of the glass.
-
Finished concrete: Suitable for scenarios where deep drilling is not possible (e.g., limited base thickness), enabling glass fixing without damaging the deep structure.
Aesthetic Design: Decorative covers can be matched to hide screw heads, avoiding exposed parts affecting the appearance and making the overall glass railing cleaner.
Core Advantages: Simple installation process, no need for professional heavy equipment, and more convenient post-maintenance or disassembly. Suitable for DIY installation or scenarios where deep construction on the base is not feasible, such as fixing indoor glass stair railings.
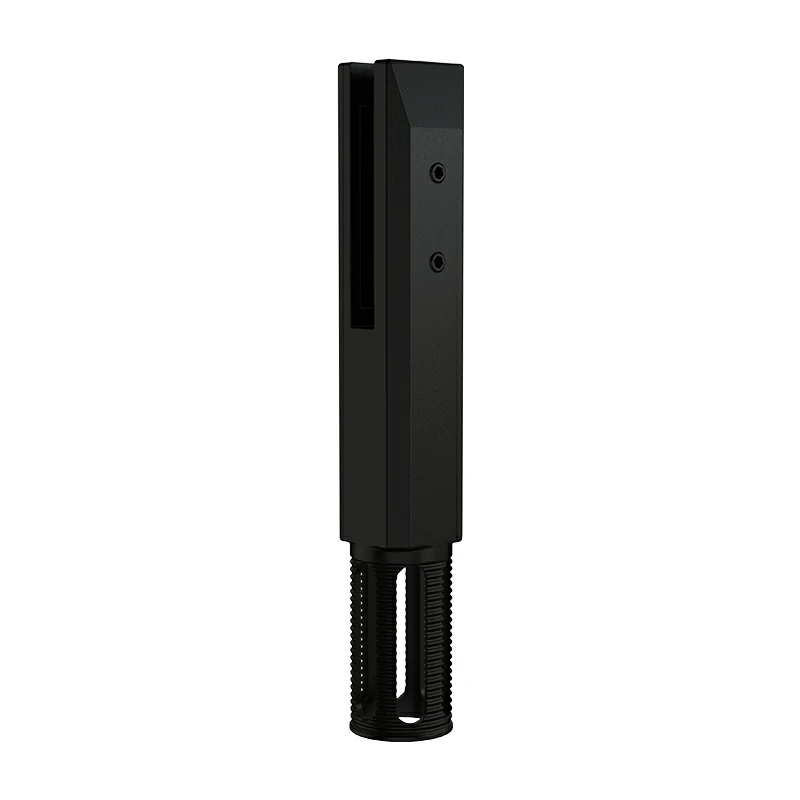
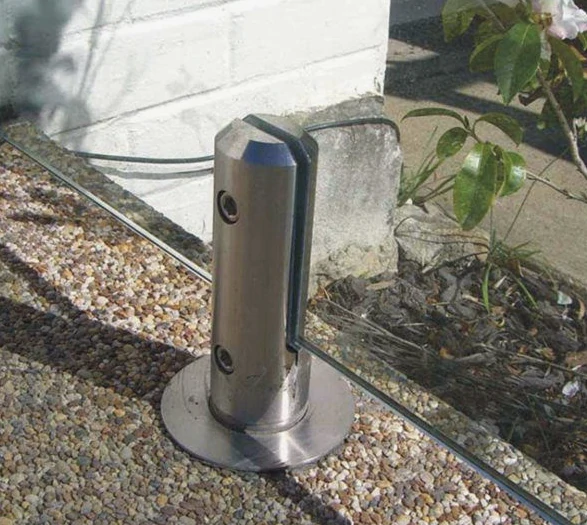
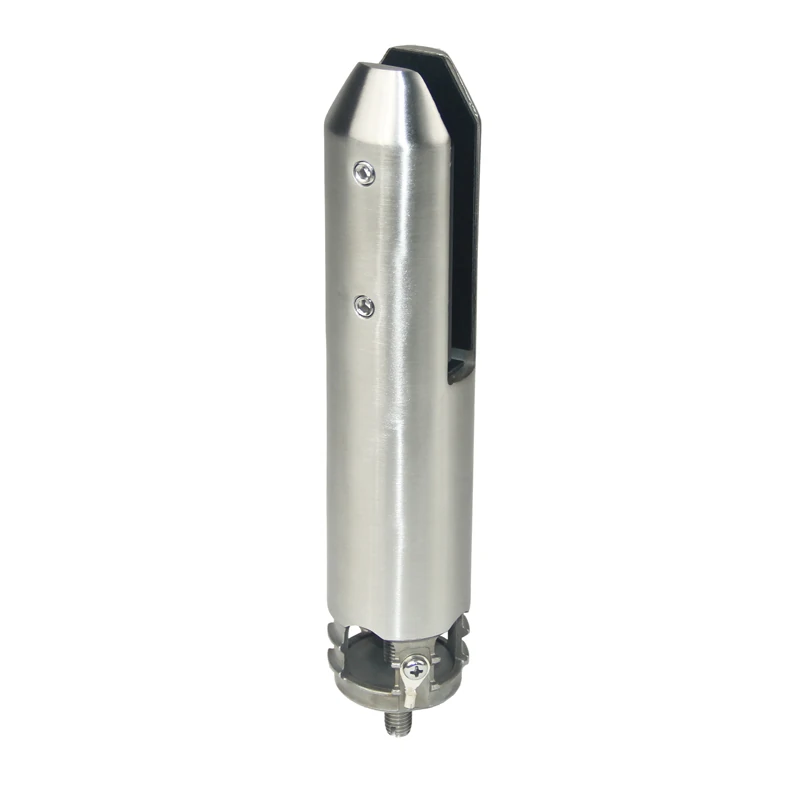
2.Drilling Pre-Embedded Glass Spigots (Embedded Type)
Structural Features: With an extended fixing rod (spigot stem), it is necessary to first drill a hole in the floor, then insert the fixing rod into the hole for fixation. It is the fixing method with the strongest stability.
Suitable Bases: Only applicable to concrete bases, requiring the base thickness to meet the drilling depth requirement of more than 120mm.
Structural Strength: The fixing rod is embedded underground to form a "deep fulcrum", with load-bearing capacity, wind resistance, and impact resistance far superior to the base plate type, which can firmly fix large-size glass panels.
Aesthetic Design: No visible base plate, only the main body of the glass spigot rises from the floor, highlighting a minimalist style. It matches frameless glass more transparently and does not damage the overall visual effect.
Core Advantages: Optimal structural stability, suitable for scenarios with high safety requirements such as balconies of high-rise buildings, pool fences, and large outdoor glass railings. It can withstand the weight of glass and external forces for a long time.
Classification by Functional Characteristics – Which Functional Type to Choose?
According to the special needs of the use scenario, glass spigots are divided into standard type, adjustable type, and safety type in terms of function, accurately matching different usage pain points.
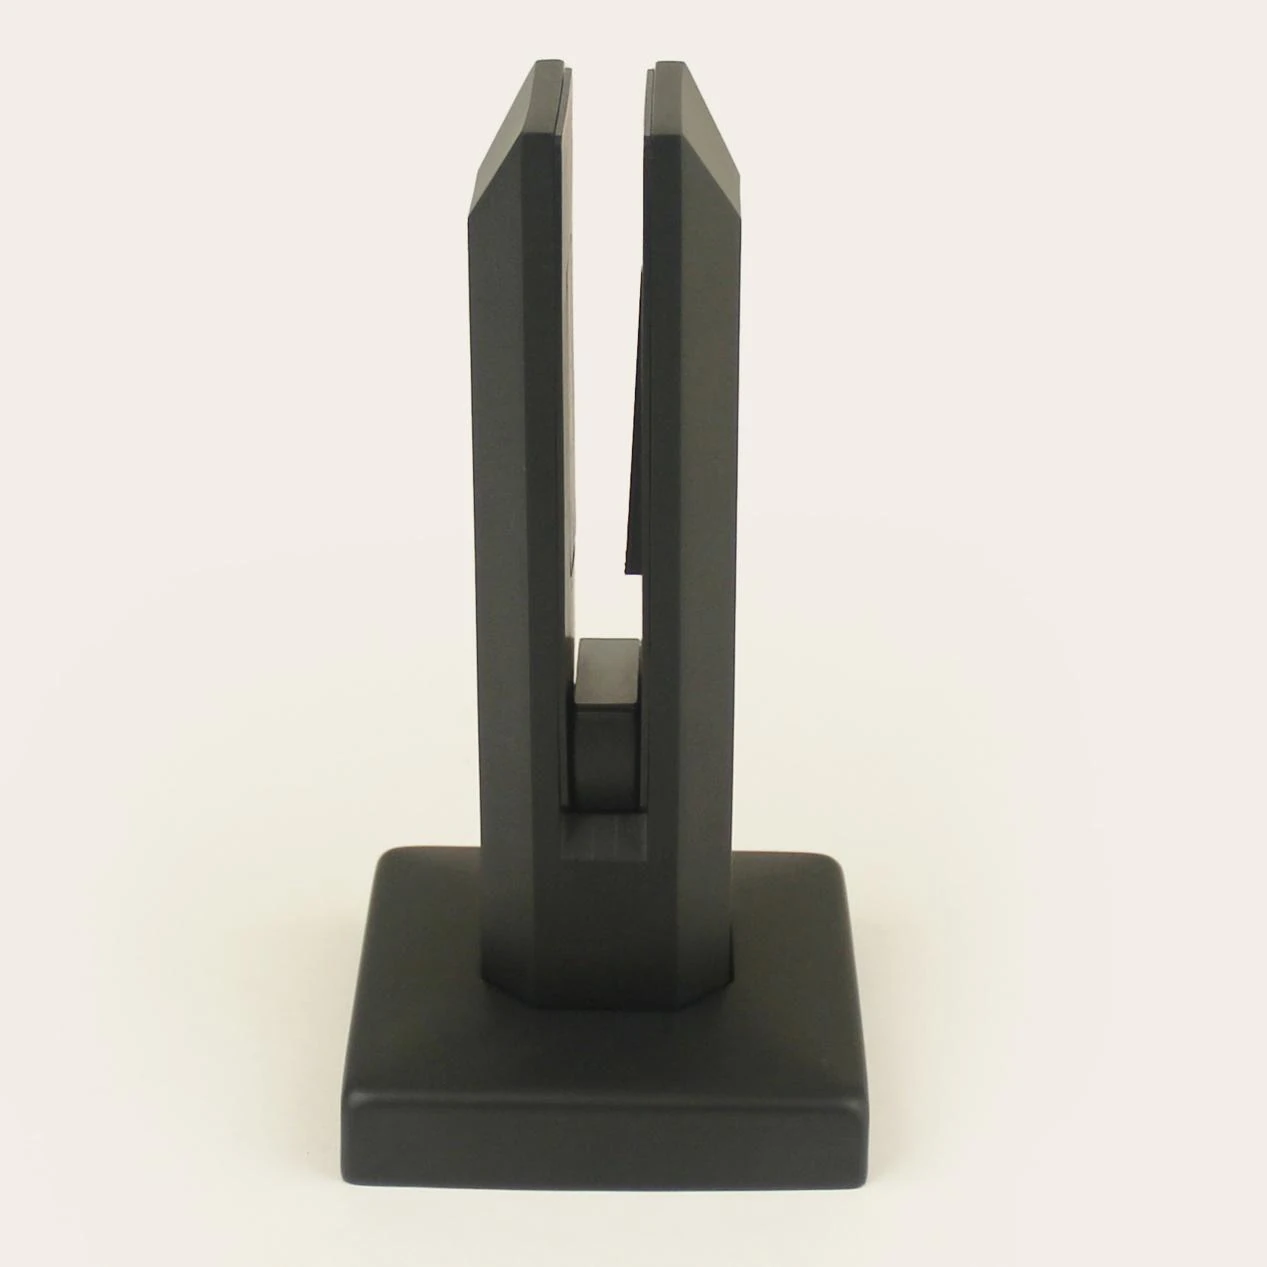
1.Standard Friction-Type Glass Spigots
Working Principle: Clamp the glass panel through the pressure plate and jackscrew, realize fixation by friction, and rely on the flatness of the base to ensure the glass is vertical.
Applicable Scenarios: Scenarios where the floor is completely level and no adjustment is needed, such as factory-prefabricated standard floors and glass railings in indoor flat areas.
Core Advantages: Simple structure, high cost performance, and direct installation process. Suitable for frameless glass fixing projects sensitive to cost and with excellent base conditions.
2.Adjustable Glass Spigots (Inclination Adjustment Technology)
Core Pain Point: Most concrete floors are designed with slopes for drainage needs, and completely level bases are rare. Traditional glass spigots are difficult to ensure the glass is vertical, affecting installation effect and safety.
Solution: Built-in horizontal adjustment screws (operated by an ). After installation, the glass angle can be adjusted forward, backward, left, and right to easily correct deviations caused by uneven floors.
Core Advantages: Greatly saves installation time, no need for cumbersome gasket leveling. Even if the base has a slope, it can quickly achieve vertical alignment of glass panels. Especially suitable for DIY installation or scenarios with complex floor conditions, such as outdoor terraces and non-standard floor glass railings.
3.Grounded Glass Spigots (Safety Protection Type)
Core Requirement: According to electrical safety regulations, pool fences within 1.25 meters of the water surface must be equipped with equipotential bonding devices to avoid electric shock risks caused by water conduction.
Functional Features: Built-in grounding terminals, which can connect glass, glass spigots, and the grounding system to form protection and eliminate leakage hazards.
Applicable Scenarios: Water-adjacent scenarios such as pool fences, hot spring pool glass railings, and water feature areas. It is an essential glass fixing accessory to meet safety specifications.
Comparison of Installation Processes – Step-by-Step Analysis of Two Core Installation Methods
The installation processes of different fixing methods are significantly different. The following is a detailed step-by-step comparison to help you clearly grasp the operation points and ensure stable glass fixing.
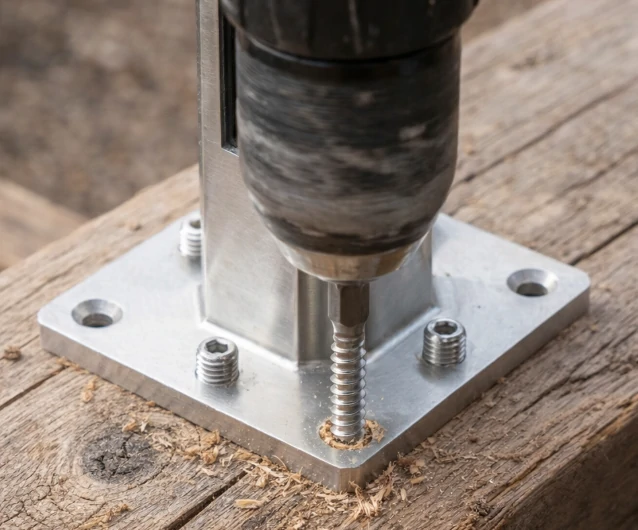
Plan A: Installation Steps for Screw-Fixed Glass Spigots (Base Plate Type)
-
Line Setting and Positioning: Pop up the center line of glass spigot installation with to ensure all glass spigots are on the same straight line with uniform spacing (conventional spacing ≤ 1.2 meters, adjusted according to glass thickness).
-
Drilling Preparation: For wood bases, guide holes must be drilled first to avoid wood cracking when screws are driven in; for concrete bases, impact drills are used to drill holes and implant expansion bolts to lay the foundation for glass spigot fixing.
-
Leveling and Padding: If the floor is slightly uneven, place plastic horseshoe gaskets under the base plate to adjust the horizontal height and ensure the glass spigot is vertical after installation.
-
Tightening and Fixing: Tighten the bolts/screws with a wrench to ensure the base plate is closely attached to the base without looseness, ensuring the glass spigot can stably bear the weight of the glass.
-
Appearance Finishing: Put the decorative cover on the base plate to hide the screw heads and complete the installation, making the glass railing more neat in appearance.
Plan B: Installation Steps for Drilling Pre-Embedded Glass Spigots (Grouting Type)
-
Drilling Operation: Use a (usually 70mm-80mm in diameter) to drill a hole about 120mm deep, ensuring the hole wall is smooth and free of gravel residues to prepare for glass spigot embedding.
-
Hole Pretreatment: Blow the hole with a high-pressure air gun to remove dust and debris, ensuring the hole is dry and clean; wrap tape around the bottom of the glass spigot to facilitate centering during installation and avoid deviation.
-
Grouting Operation: Inject non-shrinking quick-setting grout ( ) into the hole, with a filling volume of about 2/3 of the hole volume to ensure the glass spigot is firmly fixed.
-
Positioning and Curing: Insert the glass spigot into the hole, adjust it to a completely vertical state with a level and chalk line, and keep it fixed until the grout solidifies (usually 24 hours), avoiding collision during this period.
-
Appearance Finishing: Decorative rings can be optionally installed to cover the grouting joints, improve the overall aesthetics, and make the transition between the glass spigot and the floor more natural.
Material Selection – The "Hidden Quality Key" of Glass Spigots
The material of glass spigots directly affects service life and safety performance. Different materials have significant differences in applicable scenarios and need to be selected according to the use environment:
-
Duplex Steel 2205: Optimal comprehensive performance, with strength and far superior to ordinary stainless steel. It is the standard configuration of our products, suitable for humid and salt spray environments such as coastal areas and pools, and will not rust after long-term use.
-
316 Stainless Steel: A general-purpose outdoor material with good corrosion resistance. Suitable for most outdoor scenarios (such as terraces, balconies, and ordinary outdoor glass railings) with outstanding cost performance.
-
304 Stainless Steel: Only applicable to indoor scenarios, with weak corrosion resistance, unable to resist outdoor humid or salt spray environments, and prone to rust after long-term use. Suitable for dry environments such as indoor glass stair railings.
Frequently Asked Questions (FAQ)
1.What is the core difference between side-mounted and floor-mounted glass spigots?
Floor-mounted glass spigots stand on the floor surface like fence posts, with strong versatility and suitable for open spaces; side-mounted glass spigots are fixed on vertical edges (facades), do not occupy floor space, can maximize the use of passage areas, and are suitable for space-constrained scenarios such as narrow staircases and small balconies.
2.When should drilling pre-embedded glass spigots be selected?
When the base is concrete and the strongest structural strength and minimalist appearance are pursued, drilling pre-embedded glass spigots should be preferred. It has no visible base plate, with deeper fixing force, suitable for scenarios with high safety requirements (such as balconies of high-rise buildings, pool fences, and large outdoor glass railings).
3.Are adjustable glass spigots really practical?
Highly practical. For uneven floors (such as drainage slopes) or DIY installation scenarios, it can achieve vertical alignment of glass through simple screw adjustment, avoiding the cumbersomeness and instability of traditional gasket leveling, greatly improving installation efficiency and final effect. It is the preferred choice for most non-standard floors.
Conclusion
As the core fixing component of frameless glass railings, the selection of glass spigots is directly related to the safety and aesthetics of glass installation. Whether it is the space-saving side-mounted type, the easy-to-install screw-fixed type, or the super-strong structural drilling pre-embedded type, the core is to match the base material, space needs, and safety standards. Correct selection can not only ensure the structural safety of systems such as glass stair railings and pool fences but also maximize the transparent aesthetics of frameless glass.
If you are not sure which glass spigot is suitable for your specific base (such as wood/concrete) or scenario (such as pool/staircase), please feel free to contact our technical team for free consultation or browse our complete glass spigot product catalog!
Footnotes
1. Standards and resources for safe glass installation. ↩︎
2. Official guidelines for pool safety barriers. ↩︎
3. Engineering definition of countersunk hole geometry. ↩︎
4. Overview of anchor bolts used in construction. ↩︎
5. Tool description for hexagonal socket screws. ↩︎
6. Safety principles for electrical bonding systems. ↩︎
7. Use of chalk lines for layout accuracy. ↩︎
8. Technique for drilling clean holes in concrete. ↩︎
9. Explanation of cement manufacturing and properties. ↩︎