Professional installation of glass pool fencing can easily run over $400 per linear meter. For that reason alone, more and more homeowners are choosing the DIY route—and with good reason. If you’re comfortable using basic tools and willing to set aside a weekend, it’s entirely possible to achieve the same clean, high-end result for 30–50% less.
That said, it’s important to be realistic from the outset. This is not a quick afternoon project. Installing frameless glass pool fencing demands accuracy, patience, and—most importantly—help. Individual glass panels typically weigh around 45kg, and even a tiny error at the base can turn into a visible lean at the top. One millimeter out at the bottom can become a full centimeter by the time you reach the top edge.
If you approach the job methodically and follow the correct sequence, the payoff is well worth the effort. A properly installed glass pool fence not only enhances safety but also adds significant visual appeal and long-term value to your property.
This guide focuses on a standard base plate (surface-mounted) installation, which is the most common choice for DIY projects on concrete slabs, patios, and decking. By the end, you’ll have a clear understanding of every stage—from planning the layout to installing a self-closing gate that meets code requirements.
Preparation: Tools & Safety Codes
Before ordering glass panels or picking up a drill, your first step should always be checking local pool fencing regulations. Requirements vary by region, but most authorities specify a minimum fence height of 1200mm (48 inches), strict limits on panel gaps, and gates that open away from the pool with self-closing and self-latching hardware.
Reach out to your local council or building department to confirm the exact rules that apply to your property. In some areas, permits and inspections are mandatory. Sorting this out early will save you time, money, and frustration later on.
Once you’ve confirmed compliance, it’s time to assemble the right tools. Quality results depend on using the right equipment:
You’ll need a hammer drill with masonry bits for concrete, along with an impact driver for fixings. A laser level is essential—this is not a job where “eyeballing it” is good enough. A chalk line or string line is needed to mark the fence layout, and a full set of Allen keys (hex keys) is required for adjusting spigot screws. Glass suction cups are strongly recommended for lifting and positioning panels safely.
Safety equipment is just as important. Heavy-duty gloves, safety glasses, and steel-toed boots are non-negotiable when working with large, tempered glass panels.
Step 1: Layout and "Marking Out"

A straight, professional-looking fence starts with accurate layout. Begin by running a string line along the entire fence perimeter, pulled tight between fixed points. This line represents the exact path your fence will follow and should remain in place throughout the marking process.
Next comes panel spacing. Most building codes allow a gap of 10mm to 50mm between glass panels, with a standard 50mm clearance from walls or posts. These gaps are functional as well as visual—they allow for expansion and ensure panels don’t bind under movement or temperature changes.
A practical tip used by professional installers is to mark the center point of each glass panel directly on the ground using chalk or a marker. This provides a clear visual guide for positioning spigots later on and reduces the chance of cumulative spacing errors.
Take your time here. Measure twice, mark once. Any inaccuracy at this stage will carry through the entire installation.
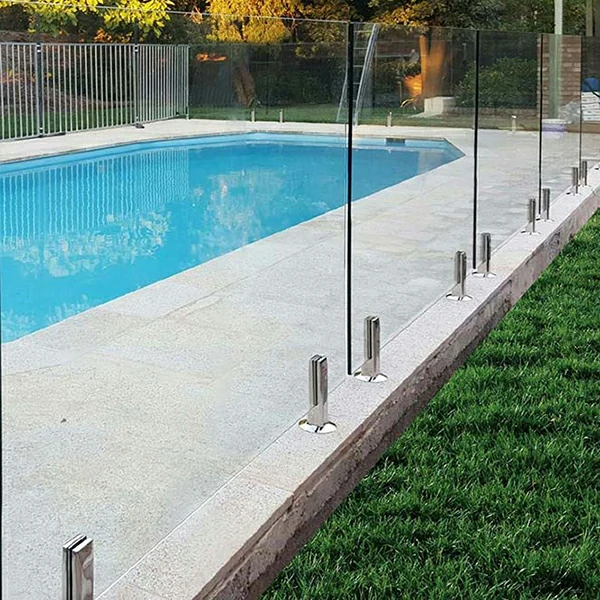
Step 2: Installing the Spigots First
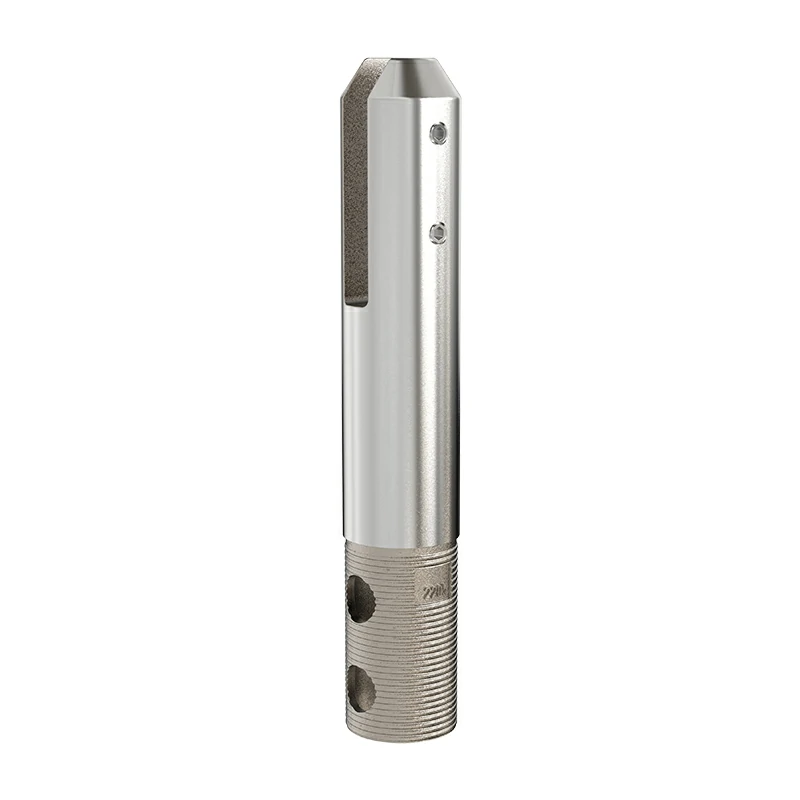
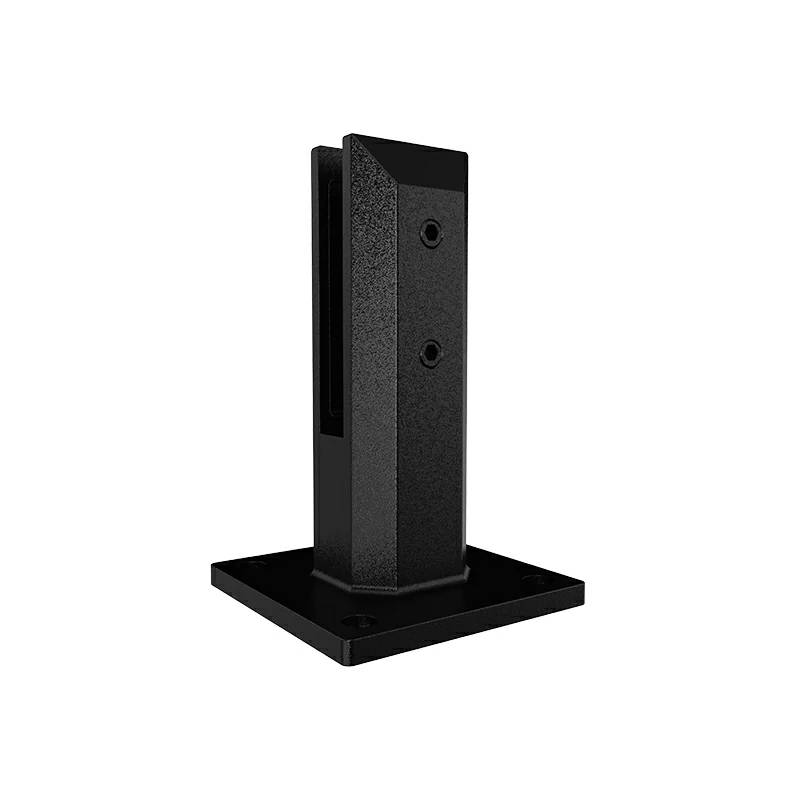
This is a common point of confusion for DIY installers, so it’s worth clarifying: spigots are fixed to the surface first, not to the glass. Once the spigots are securely mounted, the glass panels are lowered into place.
Each panel typically requires two spigots, positioned about one-sixth of the panel width in from each edge. For a standard 1200mm-wide panel, that works out to roughly 200mm from either side. This spacing provides balanced support and proper resistance to wind loads.
The fixing method depends on your surface. For concrete slabs, or pavers laid over concrete, use stainless steel expansion anchors or dynabolts rated for exterior use. When working with pavers, always core drill through to the concrete below—pavers alone are not structural.
For timber decking, heavy-duty lag screws can be used, but only if solid blocking is installed beneath the deck boards. Spigots should never be fixed directly to decking boards without proper structural support underneath.
Step 3: Leveling the Spigots (The Most Critical Step)

No surface is ever perfectly flat—not even new concrete. Small variations are normal, which is why proper leveling is absolutely critical.
Use plastic shims or horseshoe packers beneath each spigot base plate to achieve a perfectly vertical position. Check alignment with a laser level from multiple angles: front-to-back and side-to-side. Even a 1mm lean at the base can result in a visibly crooked panel once the glass is installed.
Build up the height using several thin shims rather than a single thick one, and tighten mounting bolts gradually while checking alignment repeatedly. Once everything is plumb, tighten the fixings to the manufacturer’s recommended torque.
This step takes time, but it’s the foundation of a straight, clean-looking fence. Rushing here almost always leads to regret later.
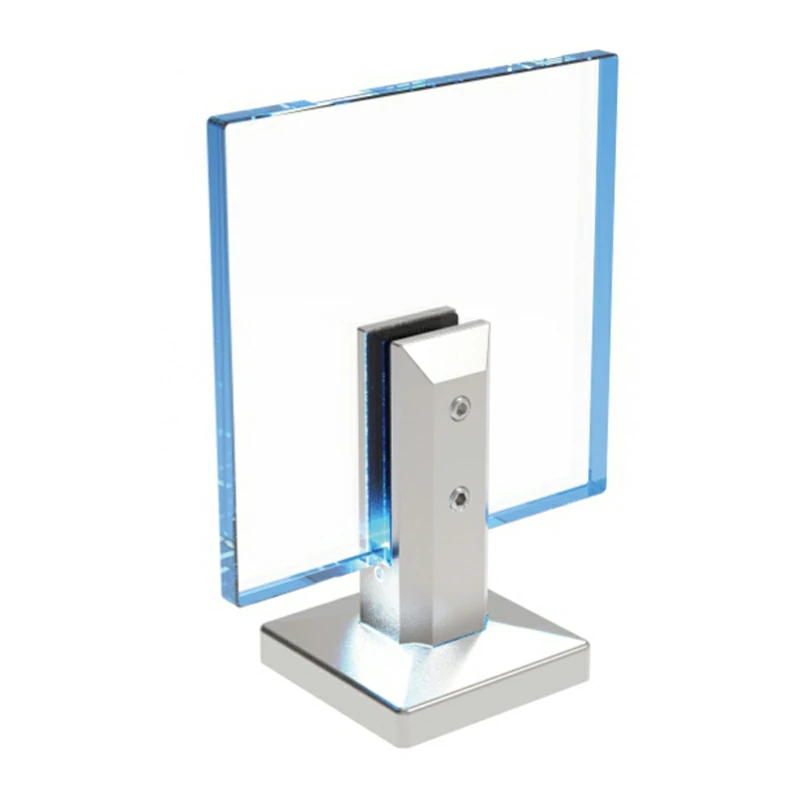
Step 4: Setting the Glass Panels

Installing glass panels is strictly a two-person job. Before lifting anything, do a dry run so both people understand the movement and final positioning.
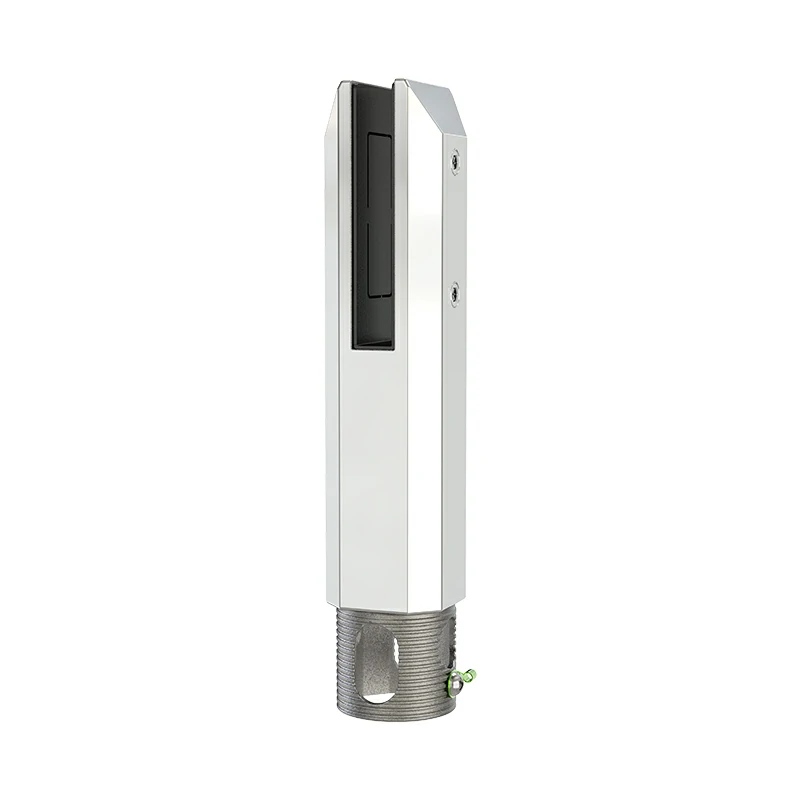
Carefully lower the panel into the spigot slots, keeping it as vertical as possible throughout the process. Ensure that all plastic liners or rubber gaskets inside the spigots are correctly installed—glass should never come into direct contact with metal.
Once the panel is seated, lightly tighten the spigot grub screws by hand. At this stage, you’re only securing the panel enough to keep it upright. Final alignment comes next.
Step 5: Alignment and Final Tightening
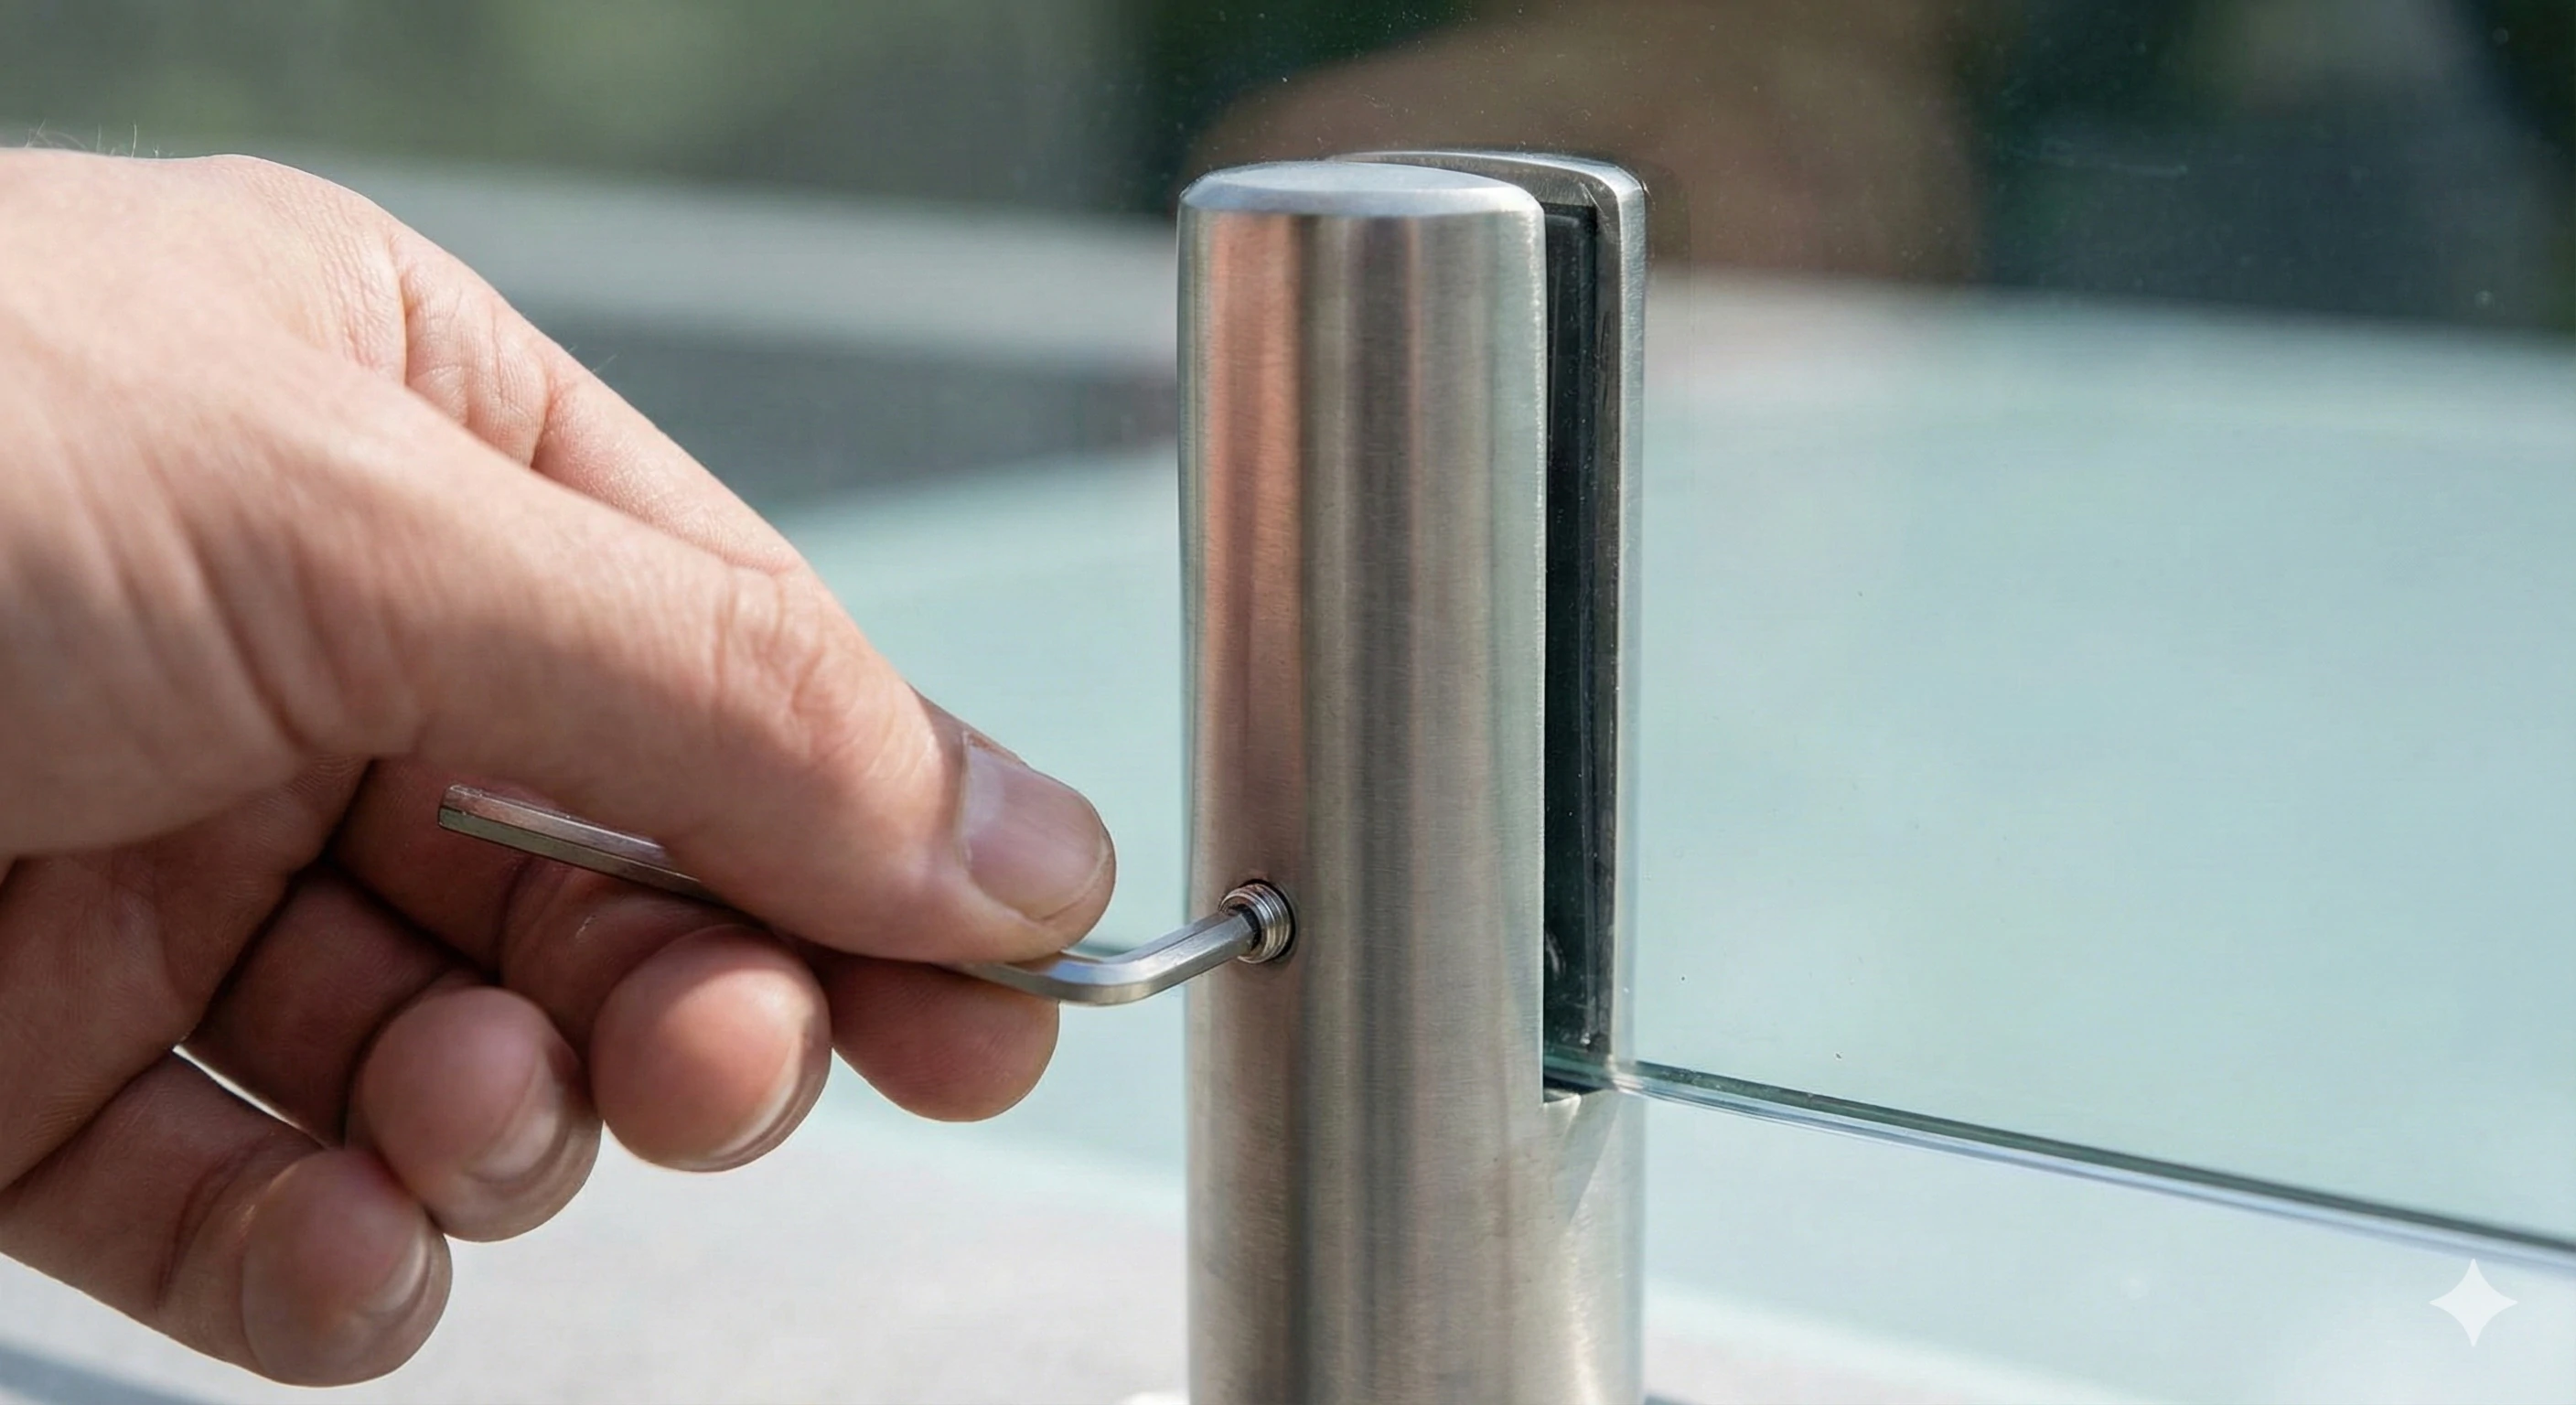
Step back and view the fence line from a distance. Look for any waviness or misalignment along the top edges of the glass.
High-quality spigots allow for fine adjustment via multiple grub screws. Use these to gently tilt panels forward, backward, or sideways until the entire fence line appears straight and uniform. Work methodically from one end to the other, making small adjustments and checking frequently.
Once you’re satisfied, tighten all grub screws fully, following a balanced pattern to distribute pressure evenly. Avoid overtightening—glass needs to be held securely, not forced.
Step 6: Hanging the Gate (The Trickiest Part)
The gate is often the most challenging part of the installation. Most DIY setups use either hydraulic soft-close hinges or traditional spring-loaded hinges. Hydraulic options cost more but offer smoother operation and a more premium feel.
Accurate spacing is critical. The gate panel typically requires a 5–8mm gap around all sides to allow the latch to engage correctly. Too much gap and the magnet won’t catch; too little and the gate will bind.
Attach the hinges to the hinge post or glass panel first, then mount the gate panel. Adjust closing speed and tension gradually until the gate closes smoothly from any angle and latches securely without slamming.
Test repeatedly. A gate that doesn’t consistently self-close and self-latch will not meet pool safety requirements.
Make Your Pool Area Beautiful and Safe
By completing this project yourself, you’ve saved thousands in installation costs while achieving a clean, modern result. A frameless glass pool fence provides unobstructed views, enhances safety, and adds long-term value to your home.
To maintain the finish, clean the glass with mild soap and a soft cloth. Avoid abrasive cleaners, and periodically check all fixings—especially in the first few months—as materials settle.
Frequently Asked Questions
How much does DIY glass pool fencing cost?
DIY glass pool fencing typically costs between $150 and $250 per linear meter, depending on glass thickness and hardware quality. Professional installation usually starts around $400 per linear meter. For a standard residential pool perimeter of 15–20 meters, DIY installation can save approximately $3,000 to $5,000 in labor costs.
How heavy is a pool fence glass panel?
A standard 12mm tempered glass panel measuring 1200mm × 1200mm weighs about 45kg (100 lbs). Because of the weight and size, panels should always be handled by two people. Glass suction cups greatly improve control and safety during installation.
Can I install glass fencing on pavers?
Glass fence spigots should never be mounted directly to pavers. Instead, core drilling must be done through the pavers into the concrete slab below, using appropriate concrete anchors. The slab provides the structural strength needed to handle wind loads and long-term stress. If no concrete base exists, consult a structural engineer for alternative solutions.